
资料下载

使用PetaLinux 2019.2的Zynqberry Pi操作系统
描述
Zynqberry 一直是我最喜欢的开发板之一,到目前为止,我觉得我主要只是花时间将我的基础设计更新到最新版本的 Xilinx IDE,然后才再次摆脱它。幸运的是,这一次我对版本 2019.2 的更新非常顺利,以至于我的小 Zynqberry 已经准备好种植自己的小项目花园(对不起,我无法抗拒可怕的双关语)。
我的第一个想法自然是如何开始移植我以前的 Raspberry Pi 项目,因为 Zynqberry 被设计为 Raspberry Pi FPGA 的替代品。我在之前的项目中创建的 Zynqberry 基础设计涵盖了使用 Zynqberry 板上所有外设所需的硬件框架。通过与 Raspberry Pi 等效的硬件设计,这使得主要区别在于 Zynqberry 上的嵌入式 Linux 映像。
为了使 Zynqberry 上的操作系统与常见的 Raspberry Pi 映像(如 Raspbian)更加模棱两可,安装 Python 及其功能(如软件包安装程序 pip)是我的第一步。
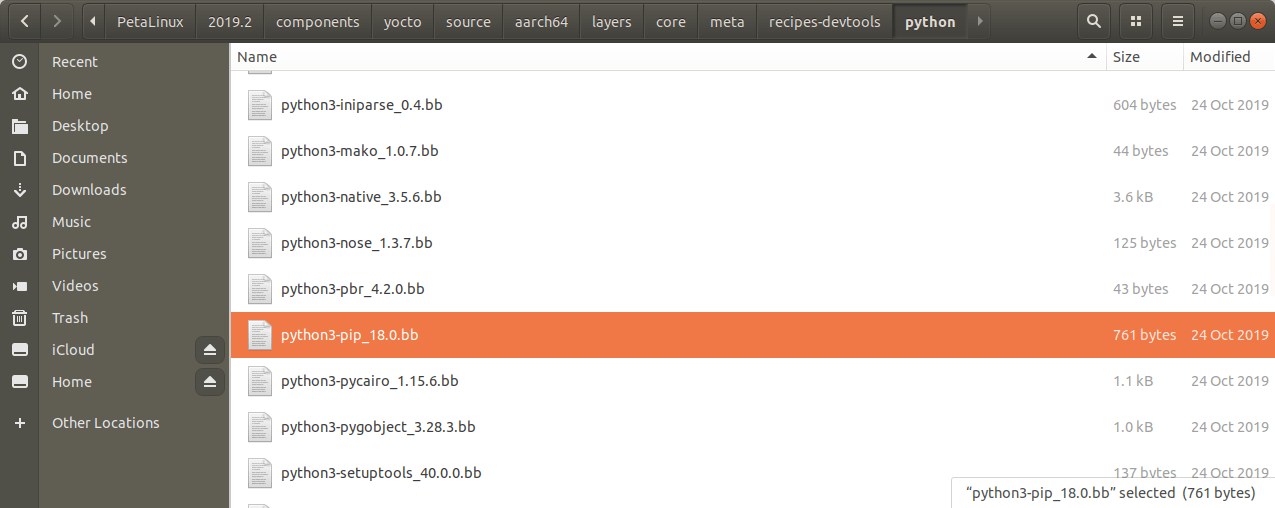
构建 PetaLinux 环境的 Yocto 框架包含 bitbake 配方,允许几乎所有标准 Linux 库包含在构建中。
要将库添加到您的构建中,请将行“CONFIG_”添加到位于/project-spec/meta-user/conf/目录中的user-rootfsconfig文件。
# System tools
CONFIG_gsl
CONFIG_nano
CONFIG_cmake

# Python3
CONFIG_python3
CONFIG_python3-pip
CONFIG_python3-cffi
CONFIG_python3-numpy
CONFIG_python3-shell
CONFIG_python3-pyserial
CONFIG_python3-threading
CONFIG_python3-multiprocessing
我选择添加 Python3 包,因为我的大多数 Raspberry Pi 项目都基于依赖于 Python3 的 Adafruit 的 CircuitPython。我注意到我在 Raspberry Pi 上使用的其他一些常用库/工具是 cmake(用于构建和打包软件的开源工具集)、GSL(GNU 科学库)和 nano(文本编辑器)。
将库添加到项目后,通过运行根文件系统的配置编辑器在映像中启用它们:
petalinux-config -c rootfs
然后在用户包下,选择每个库并使用“Y”键启用它们。
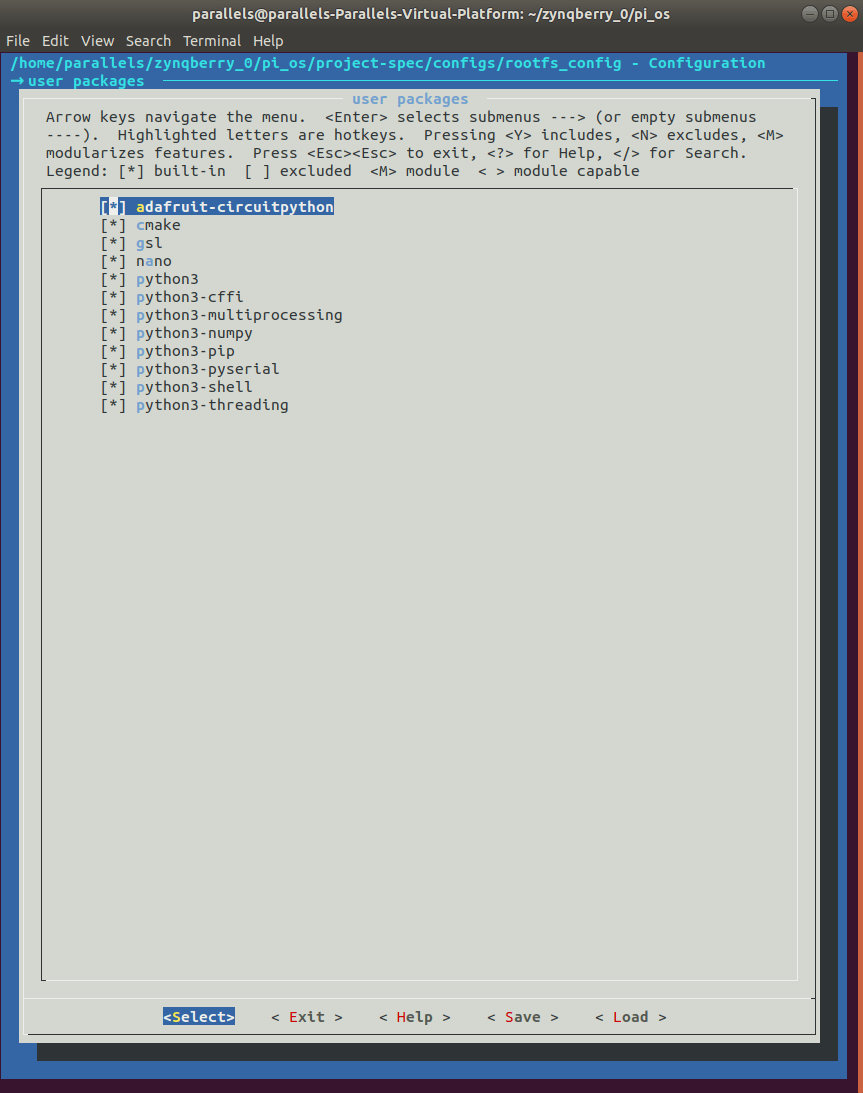
由于包管理器(如 Python 的 pip)会在安装指定包时自动解决任何缺失的依赖项,因此需要互联网连接。要启用以太网端口并使其在 Linux 用户空间中可用,需要编辑内核并创建基本 TCP/IP 网络初始化脚本和配置文件的核心配方。
要编辑内核,请运行内核配置编辑器:
petalinux-config -c kernel
使用以下选项配置内核:
CONFIG_MII=y
CONFIG_XILINX_GMII2RGMII=y
CONFIG_USB_USBNET=y
CONFIG_USB_NET_AX8817X=y
CONFIG_USB_NET_AX88179_178A=y
CONFIG_USB_NET_CDCETHER=y
# CONFIG_USB_NET_CDC_EEM is not set
CONFIG_USB_NET_CDC_NCM=y
# CONFIG_USB_NET_HUAWEI_CDC_NCM is not set
# CONFIG_USB_NET_CDC_MBIM is not set
# CONFIG_USB_NET_DM9601 is not set
# CONFIG_USB_NET_SR9700 is not set
# CONFIG_USB_NET_SR9800 is not set
# CONFIG_USB_NET_SMSC75XX is not set
CONFIG_USB_NET_SMSC95XX=y
# CONFIG_USB_NET_GL620A is not set
CONFIG_USB_NET_NET1080=y
# CONFIG_USB_NET_PLUSB is not set
# CONFIG_USB_NET_MCS7830 is not set
# CONFIG_USB_NET_RNDIS_HOST is not set
CONFIG_USB_NET_CDC_SUBSET_ENABLE=y
CONFIG_USB_NET_CDC_SUBSET=y
# CONFIG_USB_ALI_M5632 is not set
# CONFIG_USB_AN2720 is not set
CONFIG_USB_BELKIN=y
CONFIG_USB_ARMLINUX=y
# CONFIG_USB_EPSON2888 is not set
# CONFIG_USB_KC2190 is not set
CONFIG_USB_NET_ZAURUS=y
# CONFIG_USB_NET_CX82310_ETH is not set
# CONFIG_USB_NET_KALMIA is not set
# CONFIG_USB_NET_QMI_WWAN is not set
# CONFIG_USB_NET_INT51X1 is not set
# CONFIG_USB_SIERRA_NET is not set
# CONFIG_USB_VL600 is not set
# CONFIG_USB_NET_CH9200 is not set
CONFIG_FB_SIMPLE=y
# CONFIG_FRAMEBUFFER_CONSOLE is not set
CONFIG_SND_SIMPLE_CARD_UTILS=y
CONFIG_SND_SIMPLE_CARD=y
CONFIG_USBIP_CORE=y
# CONFIG_USBIP_VHCI_HCD is not set
# CONFIG_USBIP_HOST is not set
# CONFIG_USBIP_VUDC is not set
# CONFIG_USBIP_DEBUG is not set
为基本 TCP/IP 网络初始化脚本和配置文件的核心配方创建目录:
mkdir project path>/project-spec/meta-user/recipes-core/init-ifupdown/init-ifupdown-1.0
创建接口文件,
cat ./interfaces
并向其中添加以下内容:
auto lo
iface lo inet loopback
## Static IP example
#auto eth0
#iface eth0 inet static
#        address 192.168.1.190
#        netmask 255.255.255.0
#        network 192.168.1.0
#        gateway 192.168.1.1
## DHCP Example
auto eth0
iface eth0 inet dhcp
然后在/project-spec/meta-user/recipes-core/init-ifupdown目录中为 init-ifupdown 包创建名为init-ifupdown_1.0.bbappend的 bitbake 文件,并将以下行添加到它:
FILESEXTRAPATHS_prepend := "${THISDIR}/init-ifupdown-1.0:"
内核需要通过设备树指定给它的以太网硬件的钩子。在/project-spec/meta-user/recipes-bsp/device-tree/files/目录中编辑用户可配置的设备树源文件 system-user.dtsi 。以下是 Zynqberry 上所有外围设备的最全面的设备树:
/include/ "system-conf.dtsi"
/ {

    aliases{
        eth0 = &usb0;
    };

};

/ {
    #address-cells = <1>;
    #size-cells = <1>;

    reserved-memory {
        #address-cells = <1>;
        #size-cells = <1>;
        ranges;
        hdmi_fb_reserved_region@1FC00000 {
            compatible = "removed-dma-pool";
            no-map;
            // 512M (M modules)
            reg = <0x1FC00000 0x400000>;
            // 128M (R modules)
            //reg = <0x7C00000 0x400000>;
            };
        camera_fb_reserved_region@1FC00000 {
            compatible = "removed-dma-pool";
            no-map;
            // 512M (M modules)
            reg = <0x1FC00000 0x400000>;
            // 128M (R modules)
            //reg = <0x7800000 0x400000>;
        };
    };

    hdmi_fb: framebuffer@0x1FC00000 {           // HDMI out
        compatible = "simple-framebuffer";
        // 512M (M modules)
        reg = <0x1FC00000 (1280 * 720 * 4)>;    // 720p
        // 128M (R modules)
        //reg = <0x7C00000 (1280 * 720 * 4)>;   // 720p
        width = <1280>;                         // 720p
        height = <720>;                         // 720p
        stride = <(1280 * 4)>;                  // 720p
        format = "a8b8g8r8";
        status = "okay";
    };

    camera_fb: framebuffer@0x1FC00000 {         // CAMERA in
        compatible = "simple-framebuffer";
        // 512M (M modules)
        reg = <0x1FC00000 (1280 * 720 * 4)>;    // 720p
        // 128M (R modules)
        //reg = <0x7800000 (1280 * 720 * 4)>;   // 720p
        width = <1280>;                         // 720p
        height = <720>;                         // 720p
        stride = <(1280 * 4)>;                  // 720p
        format = "a8b8g8r8";
    };

    vcc_3V3: fixedregulator@0 {
        compatible = "regulator-fixed";
        regulator-name = "vccaux-supply";
        regulator-min-microvolt = <3300000>;
        regulator-max-microvolt = <3300000>;
        regulator-always-on;
    };
};

&qspi {
    #address-cells = <1>;
    #size-cells = <0>;
    status = "okay";

    flash0: flash@0 {
        compatible = "jedec,spi-nor";
        reg = <0x0>;
        #address-cells = <1>;
        #size-cells = <1>;
        spi-max-frequency = <50000000>;

        partition@0x00000000 {
        label = "boot";
        reg = <0x00000000 0x00500000>;
        };

        partition@0x00500000 {
            label = "bootenv";
            reg = <0x00500000 0x00020000>;
        };

        partition@0x00520000 {
            label = "kernel";
            reg = <0x00520000 0x00a80000>;
        };

        partition@0x00fa0000 {
            label = "spare";
            reg = <0x00fa0000 0x00000000>;
        };
    };
};

/*
* We need to disable Linux VDMA driver as VDMA
* already configured in FSBL
*/
&video_in_axi_vdma_0 {
    status = "disabled";
};

&video_out_axi_vdma_0 {
    status = "disabled";
};

&video_out_v_tc_0 {
    //xilinx-vtc: probe of 43c20000.v_tc failed with error -2
    status = "disabled";
};

&gpio0 {
    interrupt-controller;
    #interrupt-cells = <2>;
};

&i2c1 {
    #address-cells = <1>;
    #size-cells = <0>;
    i2cmux0: i2cmux@70  {
        compatible = "nxp,pca9544";
        #address-cells = <1>;
        #size-cells = <0>;
        reg = <0x70>;

        i2c1@0 {
            #address-cells = <1>;
            #size-cells = <0>;
            reg = <0>;

            id_eeprom@50 {
                compatible = "atmel,24c32";
                reg = <0x50>;
            };
        };

        i2c1@1 {    // Display Interface Connector
            #address-cells = <1>;
            #size-cells = <0>;
            reg = <1>;
        };

        i2c1@2 {    // HDMI Interface Connector
            #address-cells = <1>;
            #size-cells = <0>;
            reg = <2>;
        };

        i2c1@3 {    // Camera Interface Connector
            #address-cells = <1>;
            #size-cells = <0>;
            reg = <3>;
        };
    };
};

/{
    usb_phy0: usb_phy@0 {
        compatible = "ulpi-phy";
        #phy-cells = <0>;
        reg = <0xe0002000 0x1000>;
        view-port = <0x0170>;
        drv-vbus;
    };
};

&usb0 {
    usb-phy = <&usb_phy0>;
};

/*
* Sound configuration
*/
/{
    // Custom driver based on spdif-transmitter
    te_audio: dummy_codec_te {
        compatible = "te,te-audio";
        #sound-dai-cells = <0>;
    };

    // Simple Audio Card from AXI_I2S and custom XADC audio input and
    // PWM audio output cores
    sound {
        compatible = "simple-audio-card";
        simple-audio-card,name = "TE0726-PWM-Audio";
        simple-audio-card,format = "i2s";
        simple-audio-card,widgets =
        "Microphone", "In Jack",
        "Line", "Line In Jack",
        "Line", "Line Out Jack",
        "Headphone", "Out Jack";
        simple-audio-card,routing =
        "Out Jack", "te-out",
        "te-in", "In Jack";

        simple-audio-card,cpu {
            sound-dai = <&audio_axi_i2s_adi_0>;
        };

        simple-audio-card,codec {
            sound-dai = <&te_audio>;
        };
    };
};

&audio_axi_i2s_adi_0 {
    compatible = "adi,axi-i2s-1.00.a";
    reg = <0x43c00000 0x1000>;
    clocks = <&clkc 15>, <&clkc 18>; // FCLK_CLK0, FCLK_CLK3
    clock-names = "axi", "ref";
    dmas = <&dmac_s 0 &dmac_s 1>;
    dma-names = "tx", "rx";
    #sound-dai-cells = <0>;
};

/*
* We need to disable Linux XADC driver to use XADC for audio recording
*/
&adc {
    status = "disabled";
};
Zynqberry 板上的 Zynq 芯片无法直接访问以太网端口。四个 USB 端口和以太网端口实际上连接到 USB PHY 集线器,该集线器连接到 Zynq 芯片的 USB0 MIO 端口。这就是以太网设备 eth0 绑定到设备树中 USB0 节点的原因。
此时,保存并关闭所有文件,然后构建项目。
petalinux-build
打包启动映像并使用 Vitis 将其编程到 Zynqberry 的 QSPI 闪存中。然后将内核、设备树 blob 和根文件系统复制到 SD 卡。(我已经在我的上一篇 Zynqberry 项目帖子中介绍了这些步骤)。
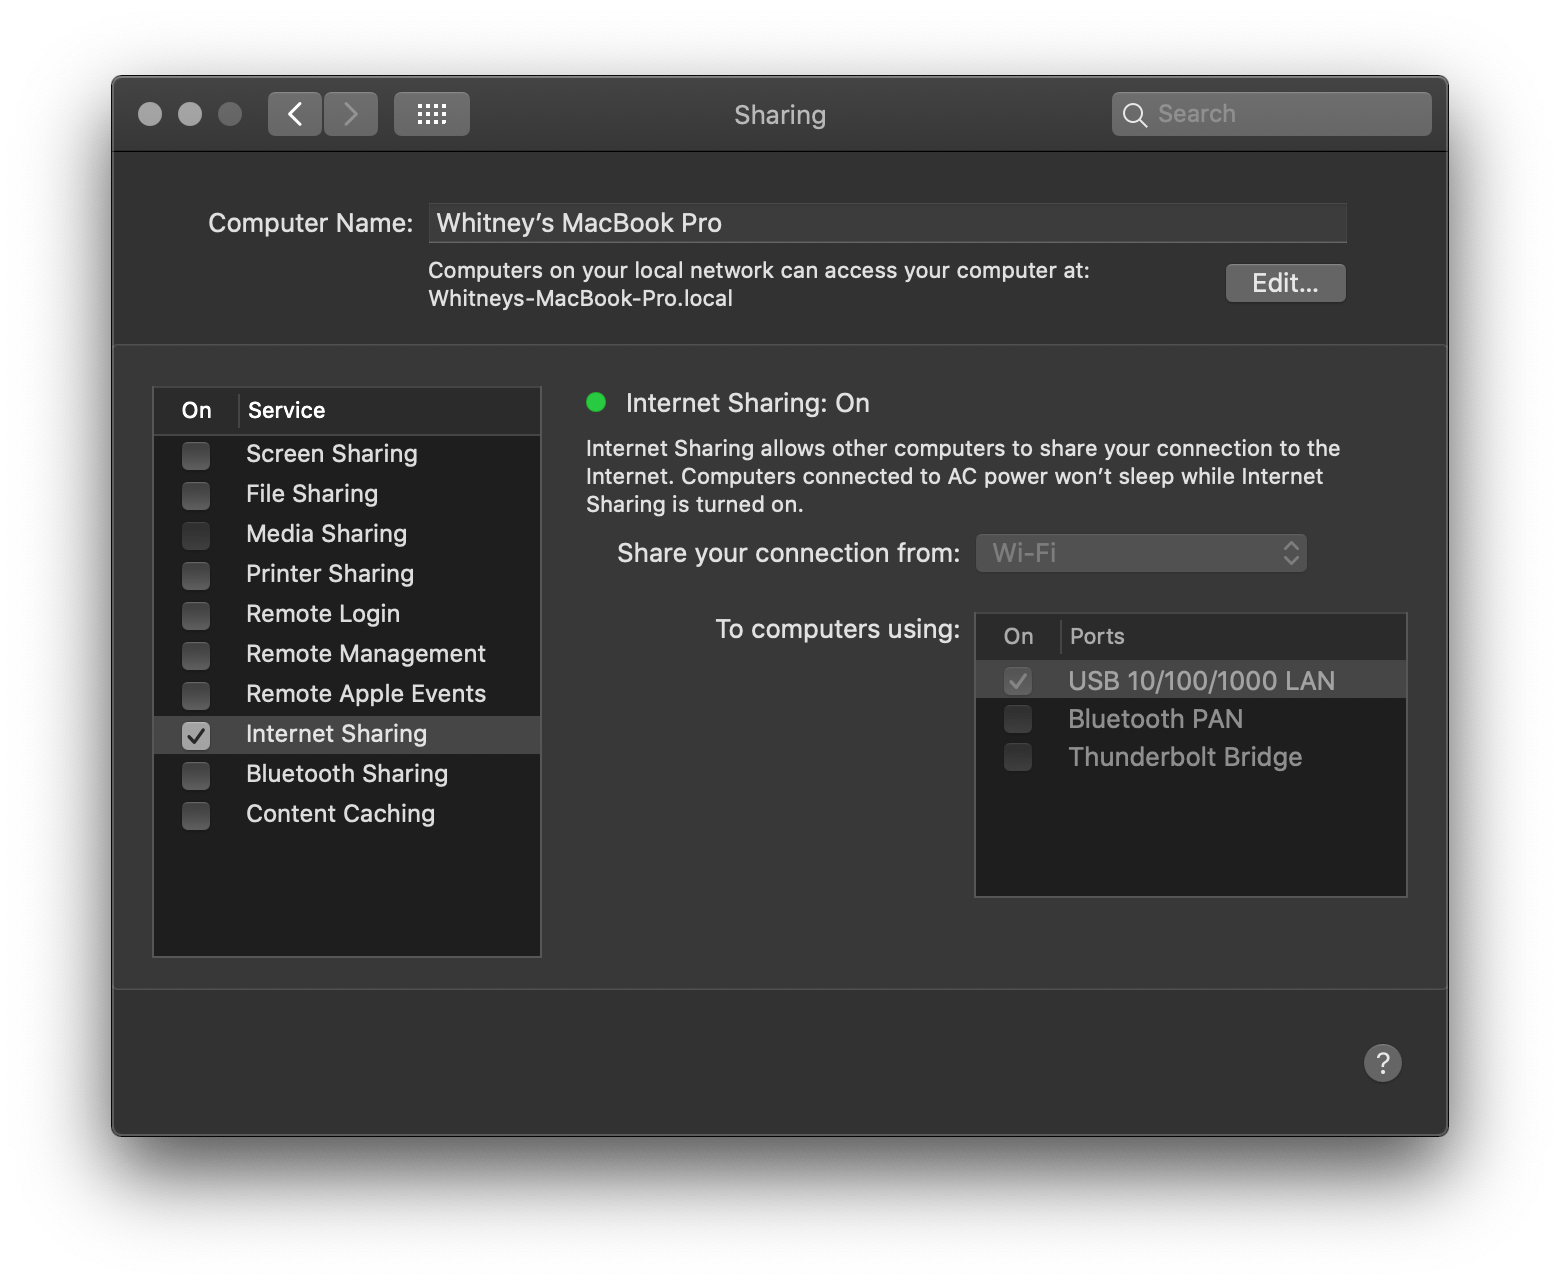
启动 Zynqberry 并使用默认用户名“root”和默认密码“root”登录(除非您选择在系统配置编辑器中更改它)。您可以将 Zynqberry 的以太网端口直接插入路由器,或者使用 PC 上的互联网共享。我选择了后一个选项,因为我的路由器不在我无法访问的修道院位置。由于 Ubuntu 在我计算机上的虚拟机中运行,因此我也将这部分切换回 Mac 端。
通过 USB-C 转以太网桥适配器,我将其配置为 Zynqberry 和我的 MacBook 之间的迷你路由器。为此,我通过为 LAN 网桥提供与我在 Zynqberry 上配置接口文件相同的网络和子网掩码上的不同 IP 地址。
旁注:不要将路由器的网关地址添加到 LAN 网桥配置中,这将与您的计算机与路由器的连接发生冲突。
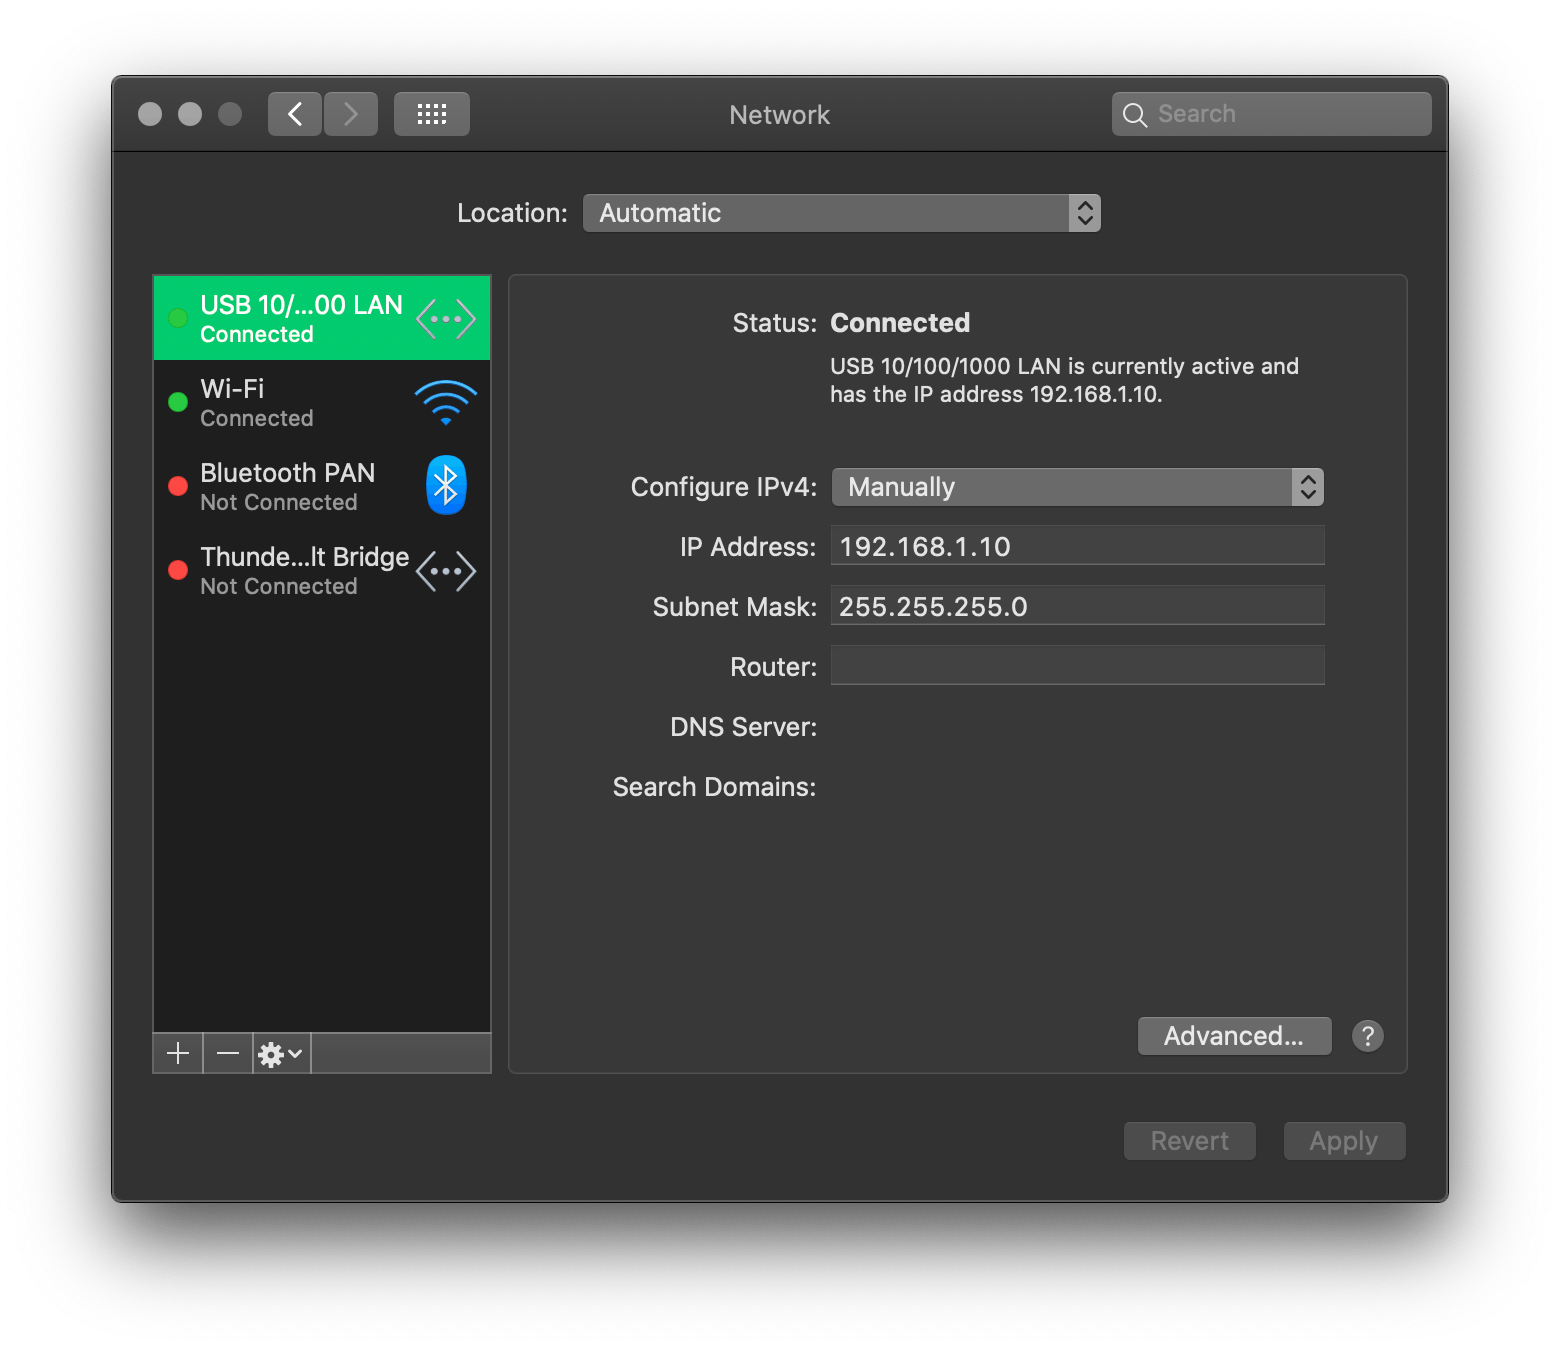
然后我启用了 LAN 网桥的 Internet 共享:
为了测试 MacBook 和 Zynqberry 之间的初始连接,我打开了一个终端窗口并将我的路由器通过 DHCP 分配给 Zynqberry 的 IP 地址 ping 通:
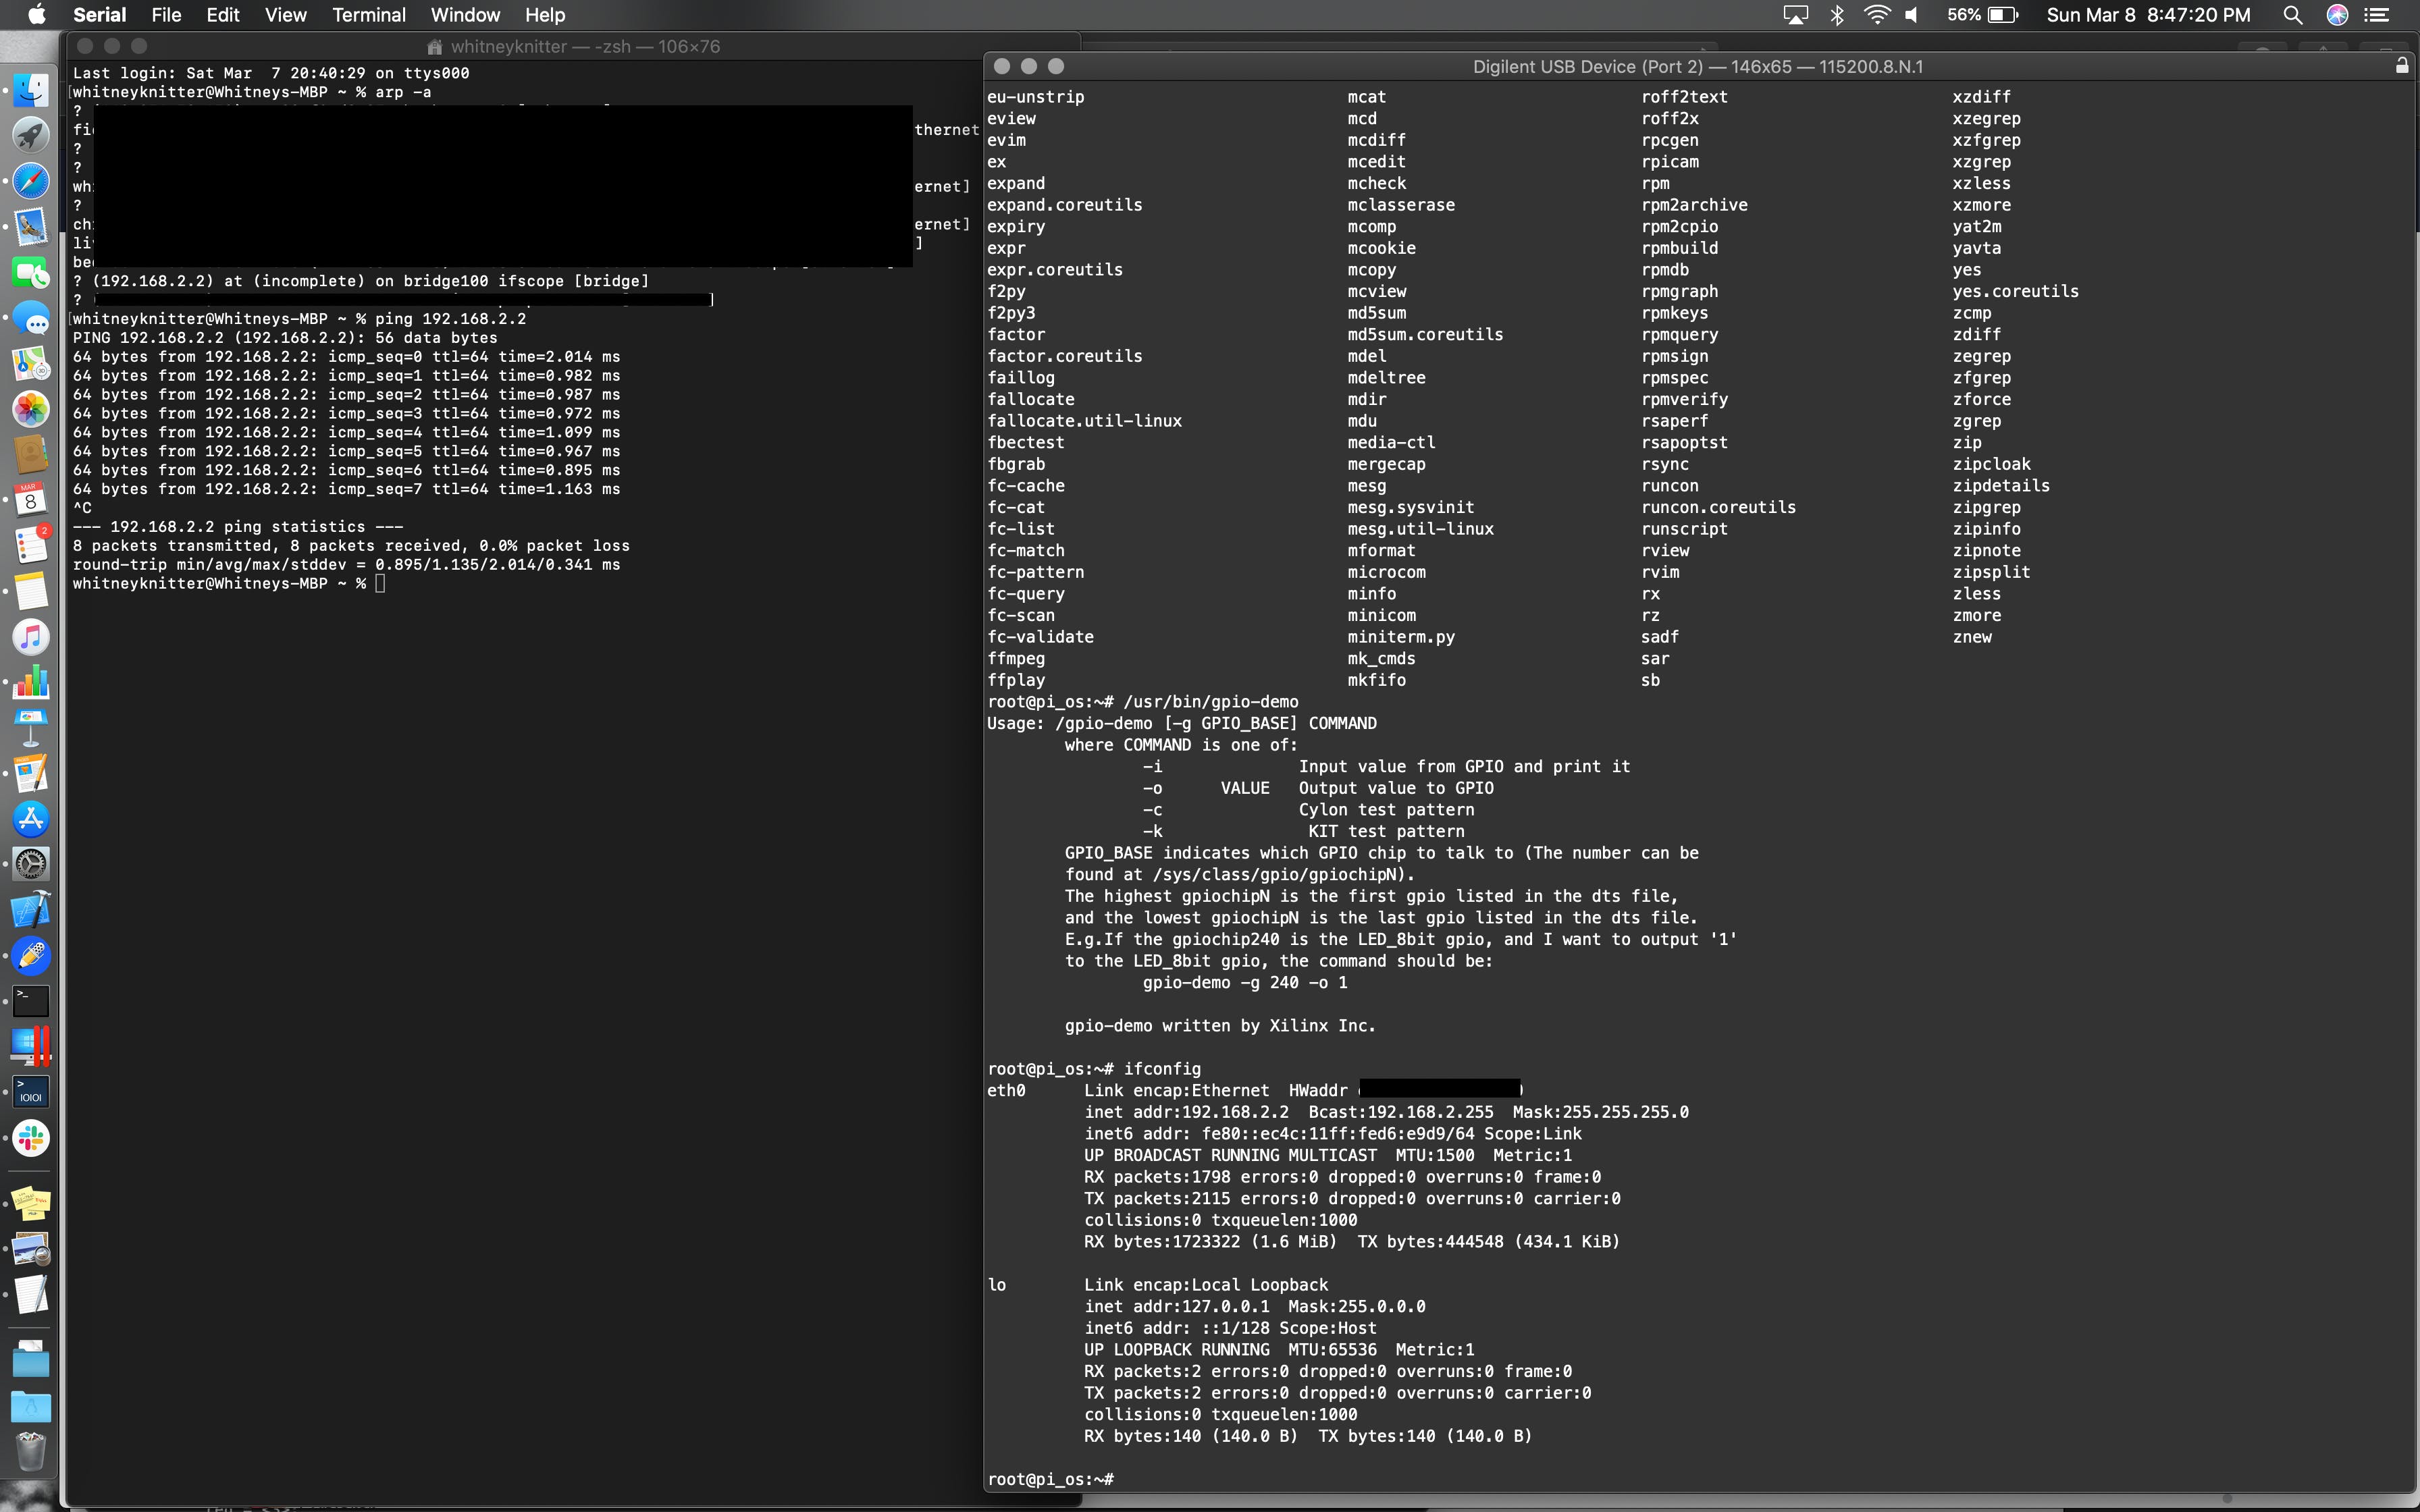
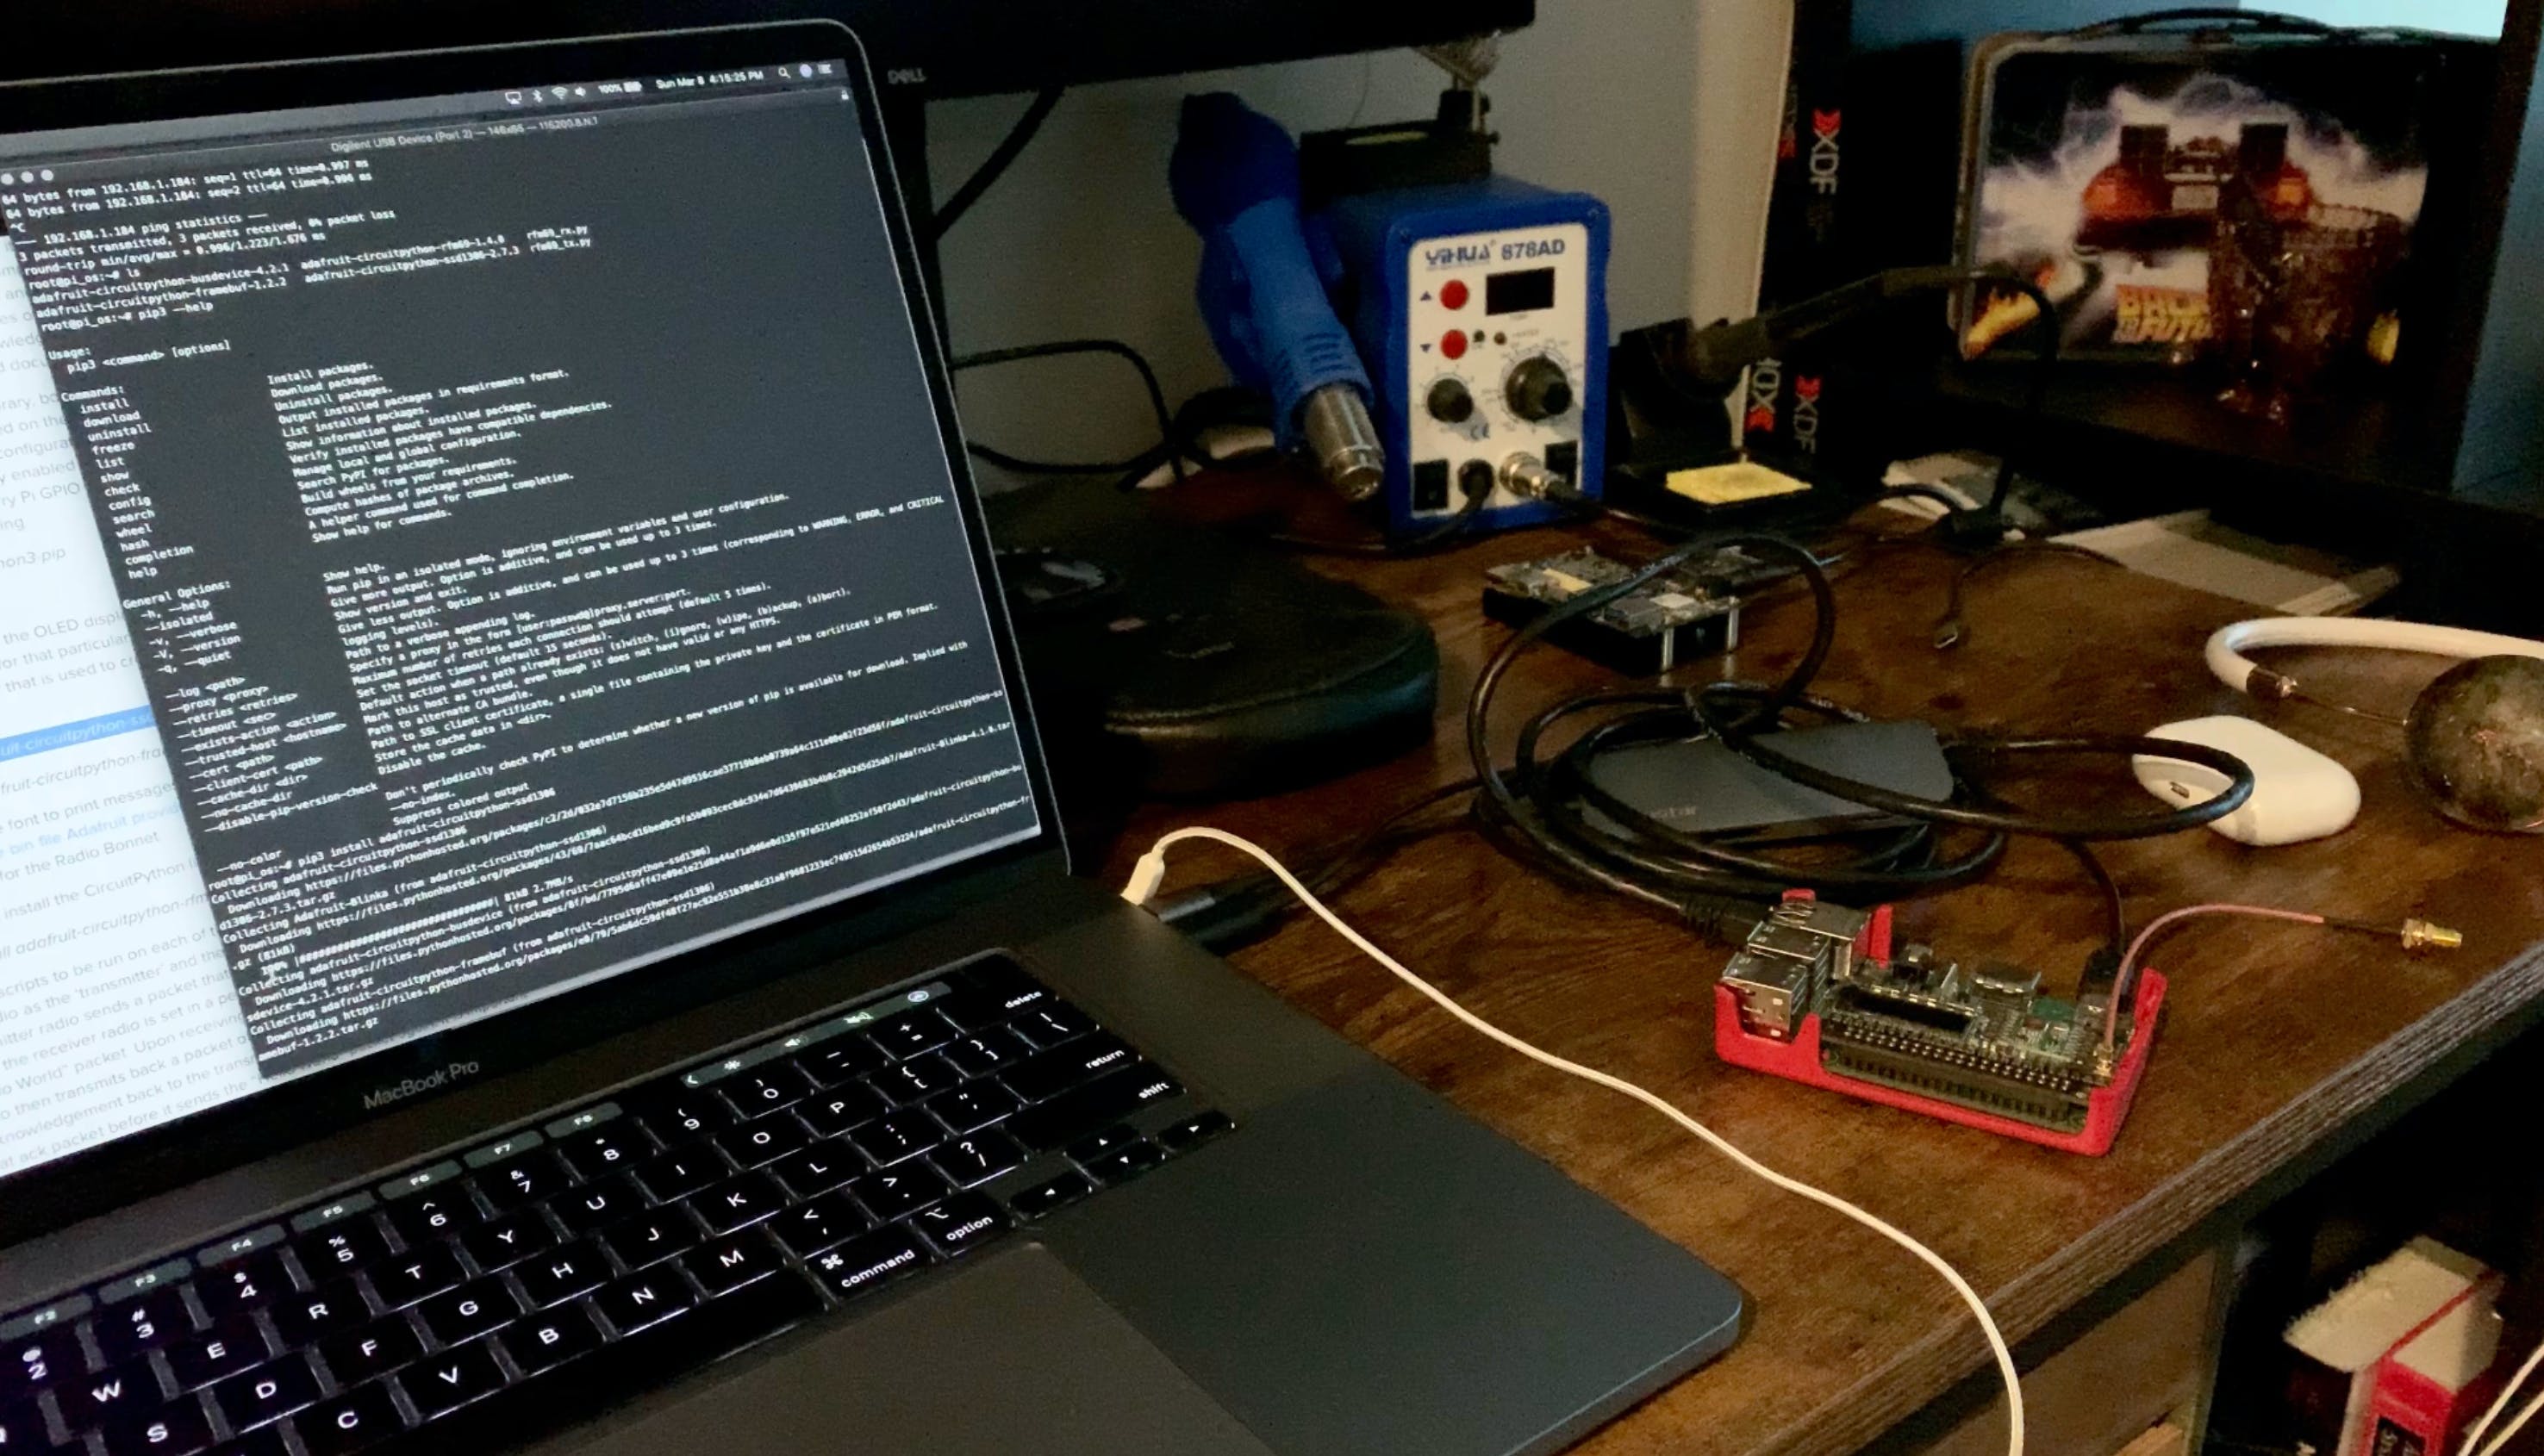
然后我通过安装一个基本的 Adafruit 库来测试互联网连接:
pip3 install adafruit-blinka
请继续关注我的下一个项目,内容包括如何在 Zynqberry 上安装 Adafruit 的 CircuitPython!
声明:本文内容及配图由入驻作者撰写或者入驻合作网站授权转载。文章观点仅代表作者本人,不代表电子发烧友网立场。文章及其配图仅供工程师学习之用,如有内容侵权或者其他违规问题,请联系本站处理。 举报投诉
- 相关下载
- 相关文章


