
资料下载

构建自己的电缆
描述
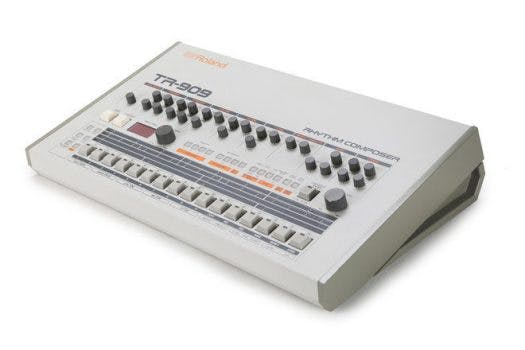
如果您可以将电缆的一端插入 Roland 鼓机,另一端插入 DAW 上的 USB,并让它们同步播放,岂不是很好?
现在您可以并且可以自己构建电缆。
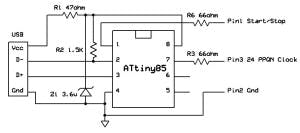
该电缆使用一个用 V-USB 编程的 ATtiny85 充当 DAW 的 MIDI 接口,接收实时消息并将其转换为 DIN Sync24 脉冲。
ATtiny 使用Micronucleus引导加载程序进行编程,并且可以在威廉希尔官方网站 中升级固件。
该界面即插即用,不需要任何 Windows、iOS 或 Android 驱动程序,并显示为标准 MIDI 界面。
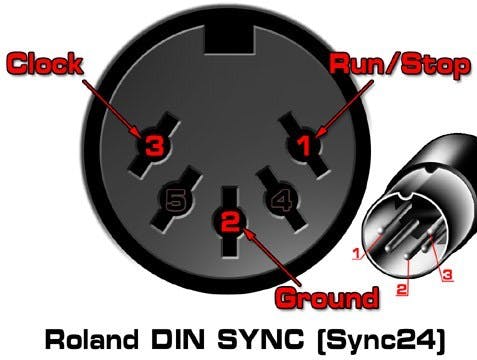
罗兰 Sync24
Roland DIN 同步接口是一个 TTL 接口,它在引脚 3 上发送 24PPQN 时钟脉冲,在引脚 1 上发送高/低状态信号以启动/停止。
微控制器将 MIDI 实时消息转换为这些信号。
时钟(十进制 248,十六进制 0xF8)
开始(十进制 250,十六进制 0xFA)
停止(十进制 252,十六进制 0xFC)
物理
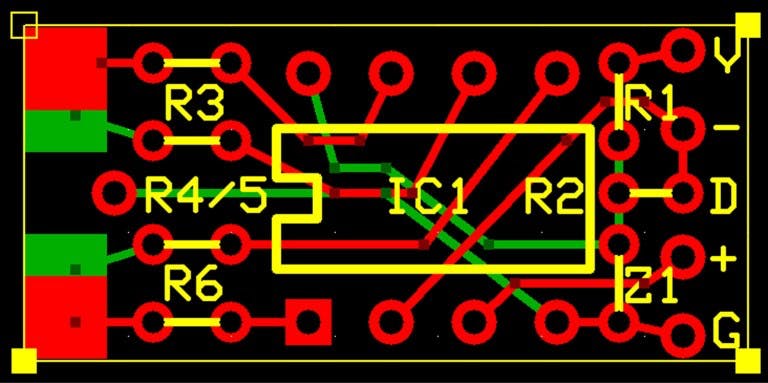
该接口建立在适合 DIN 插头的定制 PCB 上。
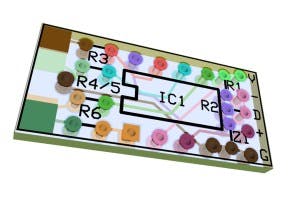
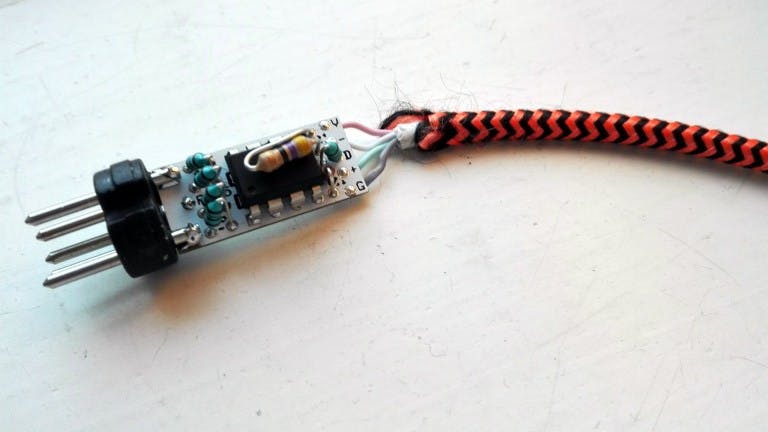
PCB 的一端焊接到 DIN 插头,USB 电缆焊接到另一端。
物料清单
IC1 ATtiny85 Sync24 MCU
R1 47ohm 电阻
R2 1.5Kohm 电阻
R3 66ohm 电阻
R4/R5 未使用
R6 66ohm 电阻
Z1 3.6v 齐纳二极管
CLB1 1 米 USB 电缆
CN1 5 针 DIN 插头
PCB1 Sync24 DIN PCB
代码
您需要在此处找到的DigiMIDI库:
https://github.com/heartscrytech/DigisparkMIDI
为了能够从主机接收 MIDI,DigiMIDI.h文件需要进行一些修改。
将其添加到函数usbFunctionWriteOut 中:
void usbFunctionWriteOut(uchar * data, uchar len) {
  if (data[1] == 0xF8) { //If Clock
    CLKcnt=500; //Reset clock counter to 2mS
    digitalWrite(5,HIGH); //Set clock output
  }
  if (data[1] == 0xFA) { //If Start
    digitalWrite(2, HIGH); //Set Start/Stop HIGH
  }
  if (data[1] == 0xFC) { //If Stop
    digitalWrite(2, LOW); //Set Start/Stop LOW
  }
}
这是SYNC24.INO草图:
// (*) All in the spirit of open-source and open-hardware
// Janost 2019 Sweden
// DIY USB MIDI to Sync
// http://blog.dspsynth.eu/diy-usb2din-sync/
// Copyright 2019 DSP Synthesizers Sweden.
//
// Author: Jan Ostman
//
// This program is free software: you can redistribute it and/or modify
// it under the terms of the GNU General Public License as published by
// the Free Software Foundation, either version 3 of the License, or
// (at your option) any later version.
// This program is distributed in the hope that it will be useful,
// but WITHOUT ANY WARRANTY; without even the implied warranty of
// MERCHANTABILITY or FITNESS FOR A PARTICULAR PURPOSE. See the
// GNU General Public License for more details.

#include ;
DigiMIDIDevice midi;
void setup() {
  pinMode(2,OUTPUT); // Run/Stop is output
  pinMode(5, OUTPUT); //Clock is output
  digitalWrite(5,LOW); //Set initial Clock to LOW;
  digitalWrite(2,LOW); //Set initial Run/Stop to LOW;
}
void loop() {
  midi.update(); //Check if any MIDI data is received
  if (CLKcnt) { //Ongoing clock pulse?
    CLKcnt--;
    if (!CLKcnt) digitalWrite(5,LOW); //Reset clock output
  }
}
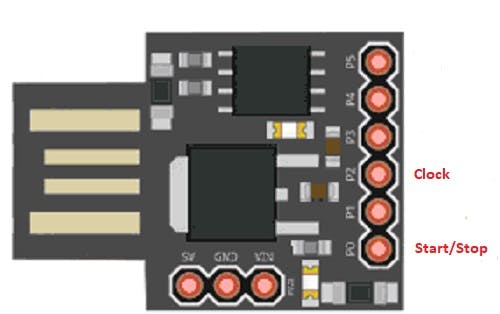
如果您想自己构建这一切,草图在 Digispark 板上运行良好。
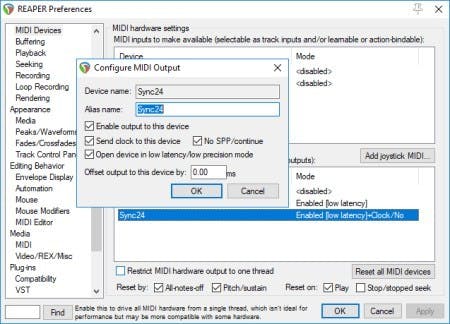
这是使用 Reaper 为 Roland 鼓机发送同步的设置:
如果您对编程和焊接技能一无所知,您可以购买预编程的 Digispark 板。
DIY 预编程 USB2Sync Digispark 可在此处获得
声明:本文内容及配图由入驻作者撰写或者入驻合作网站授权转载。文章观点仅代表作者本人,不代表电子发烧友网立场。文章及其配图仅供工程师学习之用,如有内容侵权或者其他违规问题,请联系本站处理。 举报投诉
- 相关下载
- 相关文章


