单片机学习小组
登录
直播中
听我讲
9年用户
685经验值
擅长:电源/新能源 MEMS/传感技术
私信
关注
请问Wifi的AP模式建立热点的实现方法是什么?
开启该帖子的消息推送
WIFI
如何在源码中建立demo文件?
请问Wifi的AP模式建立热点的实现方法是什么?
回帖
(1)
黄璨
2022-1-19 09:50:48
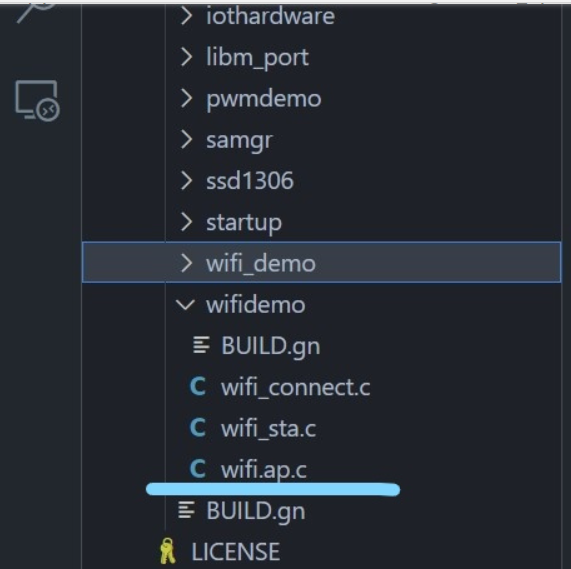
一、在源码中建立demo文件
在app下建立wifidemo文件夹并创建BUILD.gn和wifi_ap.c文件
二、编写代码
代码来自gitee上的开源项目hihopeorg
在wifidemo/wifi_ap.c中写入
#include
#include
#include
#include "ohos_init.h"
#include "cmsis_os2.h"
#include "wifi_hotspot.h"
#include "lwip/netifapi.h"
static volatile int g_hotspotStarted = 0;
static void OnHotspotStateChanged(int state)
{
printf("OnHotspotStateChanged: %d.rn", state);
if (state == WIFI_HOTSPOT_ACTIVE) {
g_hotspotStarted = 1;
} else {
g_hotspotStarted = 0;
}
}
static volatile int g_joinedStations = 0;
static void PrintStationInfo(StationInfo* info)
{
if (!info) return;
static char macAddress[32] = {0};
unsigned char* mac = info->macAddress;
snprintf(macAddress, sizeof(macAddress), "%02X:%02X:%02X:%02X:%02X:%02X",
mac[0], mac[1], mac[2], mac[3], mac[4], mac[5]);
printf(" PrintStationInfo: mac=%s, reason=%d.rn", macAddress, info->disconnectedReason);
}
static void OnHotspotStaJoin(StationInfo* info)
{
g_joinedStations++;
PrintStationInfo(info);
printf("+OnHotspotStaJoin: active stations = %d.rn", g_joinedStations);
}
static void OnHotspotStaLeave(StationInfo* info)
{
g_joinedStations--;
PrintStationInfo(info);
printf("-OnHotspotStaLeave: active stations = %d.rn", g_joinedStations);
}
WifiEvent g_defaultWifiEventListener = {
.OnHotspotStaJoin = OnHotspotStaJoin,
.OnHotspotStaLeave = OnHotspotStaLeave,
.OnHotspotStateChanged = OnHotspotStateChanged,
};
static struct netif* g_iface = NULL;
int StartHotspot(const HotspotConfig* config)
{
WifiErrorCode errCode = WIFI_SUCCESS;
errCode = RegisterWifiEvent(&g_defaultWifiEventListener);
printf("RegisterWifiEvent: %drn", errCode);
errCode = SetHotspotConfig(config);
printf("SetHotspotConfig: %drn", errCode);
g_hotspotStarted = 0;
errCode = EnableHotspot();
printf("EnableHotspot: %drn", errCode);
while (!g_hotspotStarted) {
osDelay(10);
}
printf("g_hotspotStarted = %d.rn", g_hotspotStarted);
g_iface = netifapi_netif_find("ap0");
if (g_iface) {
ip4_addr_t ipaddr;
ip4_addr_t gateway;
ip4_addr_t netmask;
IP4_ADDR(&ipaddr, 192, 168, 1, 1); /* input your IP for example: 192.168.1.1 */
IP4_ADDR(&gateway, 192, 168, 1, 1); /* input your gateway for example: 192.168.1.1 */
IP4_ADDR(&netmask, 255, 255, 255, 0); /* input your netmask for example: 255.255.255.0 */
err_t ret = netifapi_netif_set_addr(g_iface, &ipaddr, &netmask, &gateway);
printf("netifapi_netif_set_addr: %drn", ret);
ret = netifapi_dhcps_start(g_iface, 0, 0); // 海思扩展的HDCP服务接口
printf("netifapi_dhcp_start: %drn", ret);
}
return errCode;
}
void StopHotspot(void)
{
if (g_iface) {
err_t ret = netifapi_dhcps_stop(g_iface); // 海思扩展的HDCP服务接口
printf("netifapi_dhcps_stop: %drn", ret);
}
WifiErrorCode errCode = UnRegisterWifiEvent(&g_defaultWifiEventListener);
printf("UnRegisterWifiEvent: %drn", errCode);
errCode = DisableHotspot();
printf("EnableHotspot: %drn", errCode);
}
static void WifiHotspotTask(void *arg)
{
(void)arg;
WifiErrorCode errCode;
HotspotConfig config = {0};
// 准备AP的配置参数
strcpy(config.ssid, "HiSpark-AP");
strcpy(config.preSharedKey, "12345678");
config.securityType = WIFI_SEC_TYPE_PSK;
config.band = HOTSPOT_BAND_TYPE_2G;
config.channelNum = 7;
osDelay(10);
printf("starting AP ...rn");
errCode = StartHotspot(&config);
printf("StartHotspot: %drn", errCode);
int timeout = 60;
while (timeout--) {
printf("After %d seconds Ap will turn off!rn", timeout);
osDelay(100);
}
printf("stop AP ...rn");
StopHotspot();
printf("stop AP ...rn");
}
static void WifiHotspotDemo(void)
{
osThreadAttr_t attr;
attr.name = "WifiHotspotTask";
attr.attr_bits = 0U;
attr.cb_mem = NULL;
attr.cb_size = 0U;
attr.stack_mem = NULL;
attr.stack_size = 10240;
attr.priority = osPriorityNormal;
if (osThreadNew(WifiHotspotTask, NULL, &attr) == NULL) {
printf("[WifiHotspotDemo] Falied to create WifiHotspotTask!n");
}
}
APP_FEATURE_INIT(WifiHotspotDemo);
在wifidemo/BUILD.gn中写入
static_library("wifidemo") {
sources = [
"wifi_ap.c",
]
include_dirs = [
"//utils/native/lite/include",
"//kernel/liteos_m/components/cmsis/2.0",
"//base/iot_hardware/interfaces/kits/wifiiot_lite",
"//foundation/communication/interfaces/kits/wifi_lite/wifiservice",
"//vendor/hisi/hi3861/hi3861/third_party/lwip_sack/include/",
"//foundation/communication/wifi_lite/interfaces/wifiservice"
]
}
在上级目录的app/BUILD.gn中写入
import("//build/lite/config/component/lite_component.gni")
lite_component("app") {
features = [
"wifidemo",
]
}
三、在Linux下使用hb工具进行编译
root@DESKTOP-QAO2AOK:~/harmonyos/code-2.0-canary# hb set
[OHOS INFO] Input code path: .
OHOS Which product do you need? wifiiot_hispark_pegasus
root@DESKTOP-QAO2AOK:~/harmonyos/code-2.0-canary# hb build -b release
如果曾经设置过hb set就不需要再设置了,直接这样就可以了
root@DESKTOP-QAO2AOK:~/harmonyos/code-2.0-canary# hb build -b release
看到success字样即为编译成功
保存项目并打开
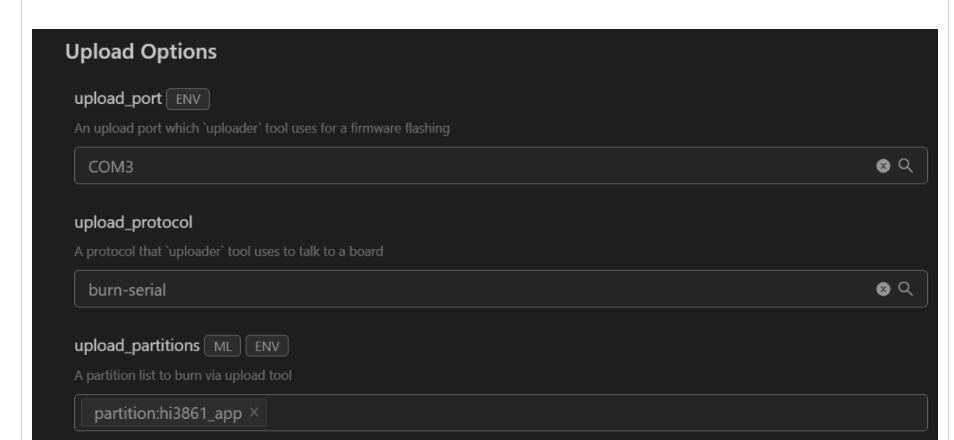
点击upload进行烧录,
烧录时需要根据提示按下开发板的rst键
,稍等片刻,看到success代表烧录成功。
烧录完成后打开串口调试助手
按下rst键重启开发板,这时候可以看到串口调试器里面已经打印出创建wifi的信息,同时用手机wifi功能可扫描到创建的wifi。
一、在源码中建立demo文件
在app下建立wifidemo文件夹并创建BUILD.gn和wifi_ap.c文件
二、编写代码
代码来自gitee上的开源项目hihopeorg
在wifidemo/wifi_ap.c中写入
#include
#include
#include
#include "ohos_init.h"
#include "cmsis_os2.h"
#include "wifi_hotspot.h"
#include "lwip/netifapi.h"
static volatile int g_hotspotStarted = 0;
static void OnHotspotStateChanged(int state)
{
printf("OnHotspotStateChanged: %d.rn", state);
if (state == WIFI_HOTSPOT_ACTIVE) {
g_hotspotStarted = 1;
} else {
g_hotspotStarted = 0;
}
}
static volatile int g_joinedStations = 0;
static void PrintStationInfo(StationInfo* info)
{
if (!info) return;
static char macAddress[32] = {0};
unsigned char* mac = info->macAddress;
snprintf(macAddress, sizeof(macAddress), "%02X:%02X:%02X:%02X:%02X:%02X",
mac[0], mac[1], mac[2], mac[3], mac[4], mac[5]);
printf(" PrintStationInfo: mac=%s, reason=%d.rn", macAddress, info->disconnectedReason);
}
static void OnHotspotStaJoin(StationInfo* info)
{
g_joinedStations++;
PrintStationInfo(info);
printf("+OnHotspotStaJoin: active stations = %d.rn", g_joinedStations);
}
static void OnHotspotStaLeave(StationInfo* info)
{
g_joinedStations--;
PrintStationInfo(info);
printf("-OnHotspotStaLeave: active stations = %d.rn", g_joinedStations);
}
WifiEvent g_defaultWifiEventListener = {
.OnHotspotStaJoin = OnHotspotStaJoin,
.OnHotspotStaLeave = OnHotspotStaLeave,
.OnHotspotStateChanged = OnHotspotStateChanged,
};
static struct netif* g_iface = NULL;
int StartHotspot(const HotspotConfig* config)
{
WifiErrorCode errCode = WIFI_SUCCESS;
errCode = RegisterWifiEvent(&g_defaultWifiEventListener);
printf("RegisterWifiEvent: %drn", errCode);
errCode = SetHotspotConfig(config);
printf("SetHotspotConfig: %drn", errCode);
g_hotspotStarted = 0;
errCode = EnableHotspot();
printf("EnableHotspot: %drn", errCode);
while (!g_hotspotStarted) {
osDelay(10);
}
printf("g_hotspotStarted = %d.rn", g_hotspotStarted);
g_iface = netifapi_netif_find("ap0");
if (g_iface) {
ip4_addr_t ipaddr;
ip4_addr_t gateway;
ip4_addr_t netmask;
IP4_ADDR(&ipaddr, 192, 168, 1, 1); /* input your IP for example: 192.168.1.1 */
IP4_ADDR(&gateway, 192, 168, 1, 1); /* input your gateway for example: 192.168.1.1 */
IP4_ADDR(&netmask, 255, 255, 255, 0); /* input your netmask for example: 255.255.255.0 */
err_t ret = netifapi_netif_set_addr(g_iface, &ipaddr, &netmask, &gateway);
printf("netifapi_netif_set_addr: %drn", ret);
ret = netifapi_dhcps_start(g_iface, 0, 0); // 海思扩展的HDCP服务接口
printf("netifapi_dhcp_start: %drn", ret);
}
return errCode;
}
void StopHotspot(void)
{
if (g_iface) {
err_t ret = netifapi_dhcps_stop(g_iface); // 海思扩展的HDCP服务接口
printf("netifapi_dhcps_stop: %drn", ret);
}
WifiErrorCode errCode = UnRegisterWifiEvent(&g_defaultWifiEventListener);
printf("UnRegisterWifiEvent: %drn", errCode);
errCode = DisableHotspot();
printf("EnableHotspot: %drn", errCode);
}
static void WifiHotspotTask(void *arg)
{
(void)arg;
WifiErrorCode errCode;
HotspotConfig config = {0};
// 准备AP的配置参数
strcpy(config.ssid, "HiSpark-AP");
strcpy(config.preSharedKey, "12345678");
config.securityType = WIFI_SEC_TYPE_PSK;
config.band = HOTSPOT_BAND_TYPE_2G;
config.channelNum = 7;
osDelay(10);
printf("starting AP ...rn");
errCode = StartHotspot(&config);
printf("StartHotspot: %drn", errCode);
int timeout = 60;
while (timeout--) {
printf("After %d seconds Ap will turn off!rn", timeout);
osDelay(100);
}
printf("stop AP ...rn");
StopHotspot();
printf("stop AP ...rn");
}
static void WifiHotspotDemo(void)
{
osThreadAttr_t attr;
attr.name = "WifiHotspotTask";
attr.attr_bits = 0U;
attr.cb_mem = NULL;
attr.cb_size = 0U;
attr.stack_mem = NULL;
attr.stack_size = 10240;
attr.priority = osPriorityNormal;
if (osThreadNew(WifiHotspotTask, NULL, &attr) == NULL) {
printf("[WifiHotspotDemo] Falied to create WifiHotspotTask!n");
}
}
APP_FEATURE_INIT(WifiHotspotDemo);
在wifidemo/BUILD.gn中写入
static_library("wifidemo") {
sources = [
"wifi_ap.c",
]
include_dirs = [
"//utils/native/lite/include",
"//kernel/liteos_m/components/cmsis/2.0",
"//base/iot_hardware/interfaces/kits/wifiiot_lite",
"//foundation/communication/interfaces/kits/wifi_lite/wifiservice",
"//vendor/hisi/hi3861/hi3861/third_party/lwip_sack/include/",
"//foundation/communication/wifi_lite/interfaces/wifiservice"
]
}
在上级目录的app/BUILD.gn中写入
import("//build/lite/config/component/lite_component.gni")
lite_component("app") {
features = [
"wifidemo",
]
}
三、在Linux下使用hb工具进行编译
root@DESKTOP-QAO2AOK:~/harmonyos/code-2.0-canary# hb set
[OHOS INFO] Input code path: .
OHOS Which product do you need? wifiiot_hispark_pegasus
root@DESKTOP-QAO2AOK:~/harmonyos/code-2.0-canary# hb build -b release
如果曾经设置过hb set就不需要再设置了,直接这样就可以了
root@DESKTOP-QAO2AOK:~/harmonyos/code-2.0-canary# hb build -b release
看到success字样即为编译成功
保存项目并打开
点击upload进行烧录,
烧录时需要根据提示按下开发板的rst键
,稍等片刻,看到success代表烧录成功。
烧录完成后打开串口调试助手
按下rst键重启开发板,这时候可以看到串口调试器里面已经打印出创建wifi的信息,同时用手机wifi功能可扫描到创建的wifi。
举报
更多回帖
rotate(-90deg);
回复
相关问答
WIFI
WIFI
怎么用,怎么作为
AP
和
热点
2015-04-02
7080
你知道NodeMCU是如何秒变
WiFi
热点
的吗?
2021-06-30
1790
CC3200在
AP
模式
下能否搜索
WIFI
信号?
请问
应该怎么操作才能在
AP
模式
下搜索附近的
WIFI
信号?
2018-06-07
2635
ESP32C3
WIFI
启动失败的原因?
2023-02-20
438
请问
esp32能不能自动找到信号最强的
wifi
ap
进行连接?
2023-02-10
175
请问
wifi
如何设置为
AP
模式
?
2022-01-06
723
请问
esp32能不能自动找到信号最强的
wifi
ap
进行连接呢?
2023-03-03
211
art-pi
wifi
ap
失败是个什么问题?
2023-03-07
458
为什么我用stm32使ESP8266
建立
热点
后网络调试助手无法连接?
2019-07-16
3664
串口
WIFI
模块做
ap
,工作在TCP
模式
下,笔记本怎样和单片机无线通信?
2017-04-01
4113
发帖
登录/注册
20万+
工程师都在用,
免费
PCB检查工具
无需安装、支持浏览器和手机在线查看、实时共享
查看
点击登录
登录更多精彩功能!
英国威廉希尔公司网站
william hill官网 版块
小组
免费开发板试用
ebook
直播
搜索
登录
×
20
完善资料,
赚取积分

 保存项目并打开
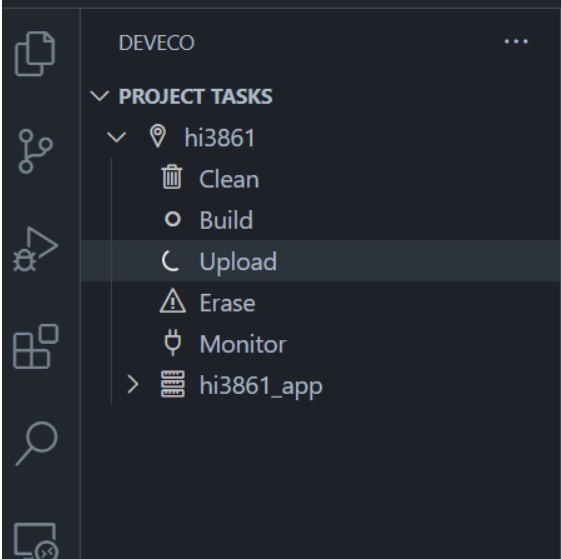 点击upload进行烧录,烧录时需要根据提示按下开发板的rst键,稍等片刻,看到success代表烧录成功。
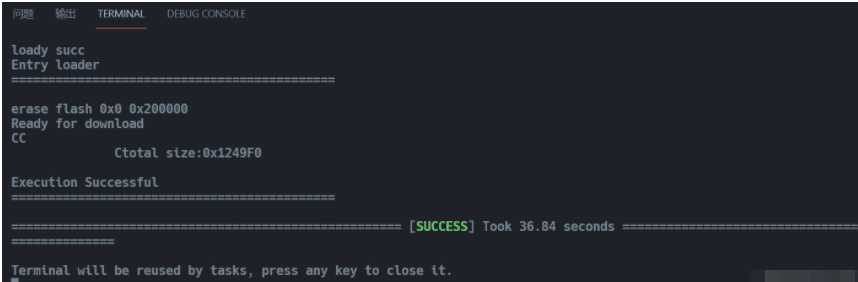 烧录完成后打开串口调试助手
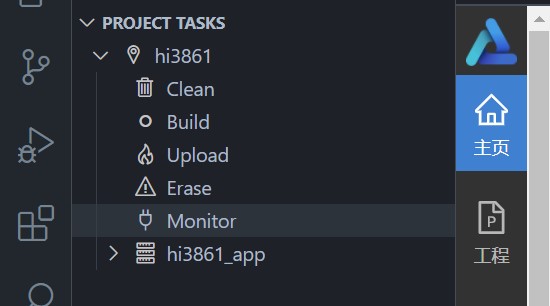

 举报
举报


